
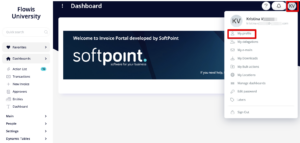
Each User has access to his own profile and can set up certain details about how the Flowis behaves when he uses his account. You can access your profile after clicking on your picture in the top right corner of the screen and then selecting “My profile”.
General setup
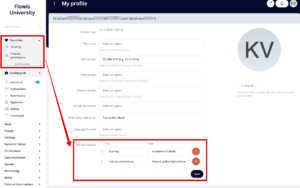
After opening your profile, you can set up:
- Time zone – all actions on Transactions will be transformed to this time zone. The default is Europe/Bratislava
- Date format – all dates on Transactions will be transformed to this format. The default is MM/DD/YYYY (11/25/2023)
- Time format – all times on Transactions will be transformed to this format. The default is 24 hours with seconds (18:53:21)
- Amount format – all amounts on Transactions will be transformed to this format. The default is EU – 2 decimals (12 345,67)
- After action redirect to – after performing an action on Transaction, you can be redirected either to your Action list, to the next Transaction or to stay in the current Transaction’s detail
- Language (locale) – which language should be used in the tool (to learn more about languages in Flowis, read our article about Translations)
- Default dashboard – which Dashboard should be seen on the homepage by default
- My favorite paths – when you have something open in Flowis, you can click the “Favorites” tab in the left menu and click “Add favorite”. This will add the current page you have opened into Favorites. In this section of your profile, you can see the list of all your Favorite pages you have, change their order, and delete them if wished.
- Profile picture – upload a .jpeg, .jpg, or .png file that will be shown in the Transaction’s history after hovering over the User’s name. File size mustn’t exceed 10MB. If you do not have a profile picture set up, the initials of your Name will be used.
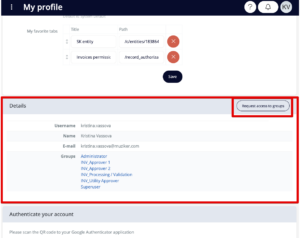
Details
In the next section, you can see the details about your profile – Username, Name, E-mail, and Groups that you are part of.
In the top right corner of this section, you can see the button “Request access to groups” which can be used to request access to those Groups that are marked as “Requestable”. To request access to Groups, you have to select which Groups you want to join, write the justification, and if needed, you can attach files related to your request. The request will then be sent for approval to your Manager and to the Group owners.
Authenticate your account
If your account requires two-factor authentication to sign up (you can read more about setting two-factor authentication in our article about Users), this section may be useful for you. It contains:
- a QR code that can be used to pair your Flowis account with a new device (for example if you have a new phone)
- a button that will unpair all devices that were paired with your account in the past and generate a new QR code to pair your account with devices
- a button will reset your authentication method and unpair all previously paired devices, furthermore, at the next login, you will be asked to choose the authentication method again (you can choose between Google authentication or e-mail authentication)

